![]()
 Sản phẩm Phụ kiện cho thiết bị mạng Cisco Bộ phụ kiện Cisco Rack mount kit Cisco Catalyst 9800 Series Wireless Controller Rack Mount Bracket

eric.van@ketnoimang.vn
cs@ketnoimang.vn

Cisco Meraki MS120-48FP Switch

Cisco Meraki MS120-8 Switch

Cisco Meraki MS125-48FP Switch

Cisco Meraki MS125-24 Switch

Cisco Meraki MS120-48LP Switch

Cisco Meraki MS125-48 Switch

Cisco Meraki MS120-8LP Switch

Cisco Meraki MS125-24P Switch

Cisco Meraki MS125-48LP Switch

 |  |  |  |  |  |
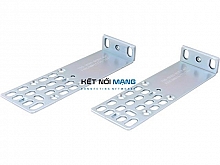
Cisco Catalyst 9800 Series Wireless Controller Rack Mount Bracket
P/N: C9800-RMNT=Cisco Catalyst 9800 Series Wireless Controller Rack Mount Bracket
Liên hệ ngay
|


Cisco Catalyst 9800 Series Wireless Controller Rack Mount Bracket
Mounting the Controller on Desktop or Shelf
Before mounting the controller on a desktop or shelf, install the rubber feet located in accessory kit shipped with the controller.
To install the rubber feet to the controller, follow these steps:
Procedure
| Step 1 |
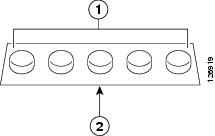
Locate the rubber feet on the black adhesive strip that is shipped with the controller. Figure 1. Identifying the Rubber Feet |
| Step 2 |
Place the controller upside down, on a smooth, flat surface. |
| Step 3 |
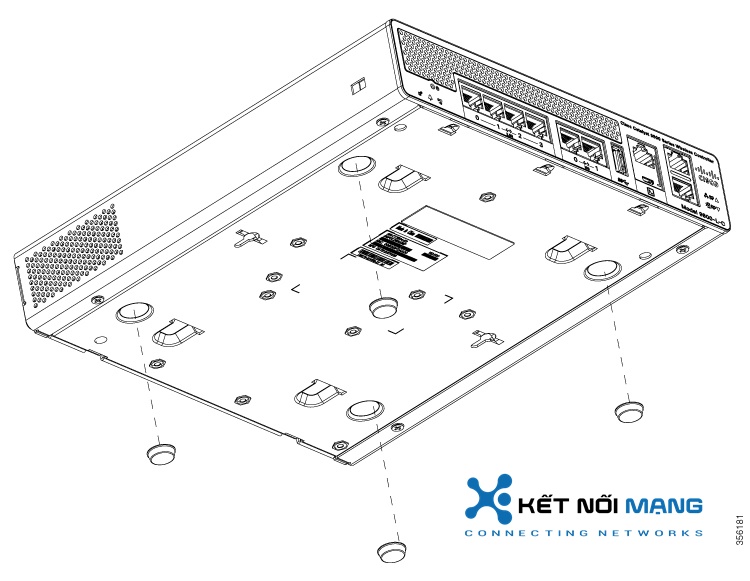
Peel off the rubber feet from the black adhesive strip and press them adhesive-side down onto the bottom four corners of the controller, see the figure below: Figure 2. Attaching the Rubber Feet |
| Step 4 |
Place the controller right-side up on a flat, smooth, secure surface. |
| Step 5 |
Connect the interface cables. |
Mounting the Controller on a Wall (Mounting Screws)
To mount the controller on a wall using mounting screws, follow these steps:
Procedure
| Step 1 |
Mark the location of the mounting screws on the wall. Use the mount hole locations on the back of the controller for placement of the mounting screws. |
||
| Step 2 |
Use a 0.107-inch (2.7mm) or #32 drill bit to drill a 3/4 inch (19mm) hole for the two mounting screws. |
||
| Step 3 |
Insert two screws into the screw holes and tighten until the top of the screws are 1/8 inch from the wall (leaving enough room for the back panel to slide onto the screws firmly). |
||
| Step 4 |
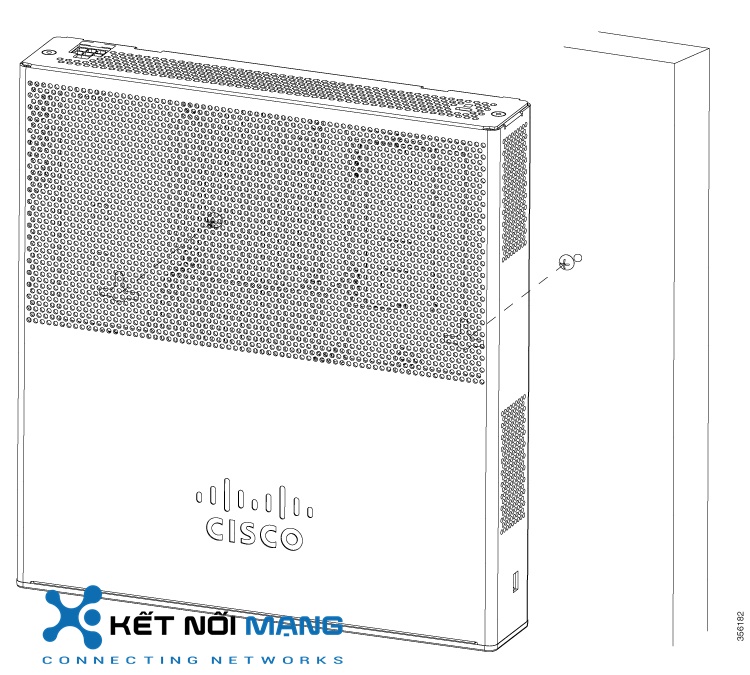
Place the controller onto the mounting screws and slide it down until it lock into place, as shown in figure below:
|
| Step 5 |
After the controller is mounted on the wall, perform the following tasks to complete the installation Connecting the Controller Console Port Securing the Power Adapter Cable Connecting to the Network |
| Step 6 |
For configuration instructions about using the CLI setup program, see the (Link to Running the Bootup script section). |
Rack Mounting the Controller
To mount the controller in a 19-inch equipment rack, you can order an optional Optional Rack Mount kit (C9800-RMNT= Cisco Catalyst 9800-L Wireless Controller Rack Mount Tray).
The rack-mount tray is designed for 19 racks and uses two rack-units spaces. To rack-mount the controller, perform the following steps:
Procedure
| Step 1 |
Remove the four rubber feet if previously installed. |
| Step 2 |
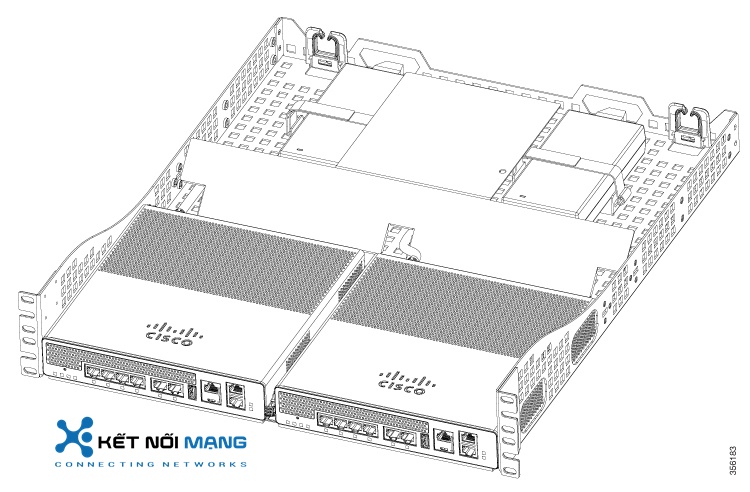
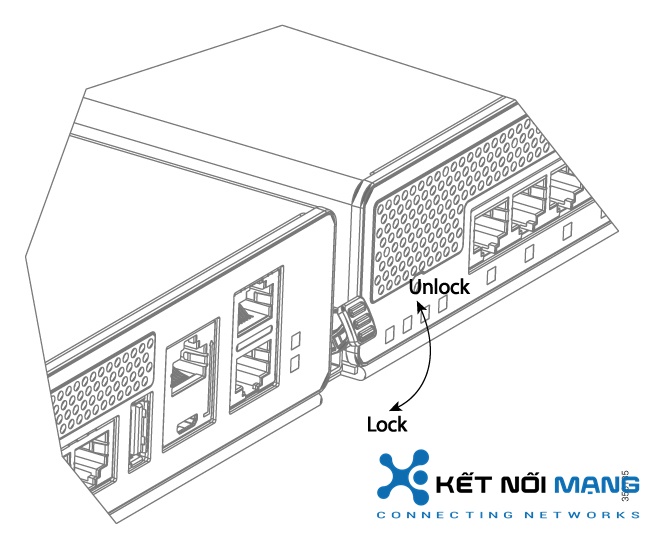
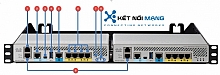
Slide the Cisco Catalyst 9800-L Wireless Controller in position such that the 4-tray tabs align and latch into the bottom of the unit as it is pushed in place. The front of the Cisco Catalyst 9800-L Wireless Controller should be flush against the front edge of the tray. A nylon latch in the center of the tray snaps into and locks the Cisco Catalyst 9800-L Wireless Controller in place. Figure 4. Placing the Controller on the Rack Mount Tray |
| Step 3 |
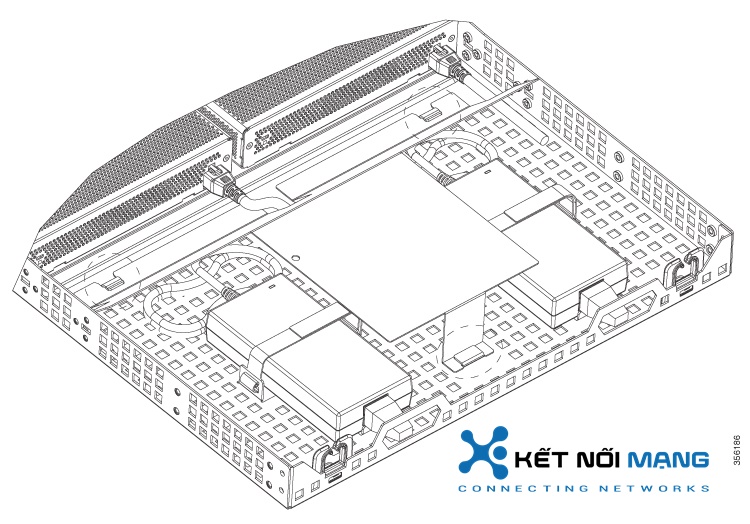
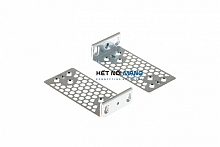
Remove power supply baffle in rear tray. Baffles secure with tabs circled. Figure 6. Power Supply Baffle |
| Step 4 |
Place the power adapters between either of the two tabs in the rear of the tray and use the provided velcro straps to secure them. |
||
| Step 5 |
Route the AC wiring through the cable management clips. |
||
| Step 6 |
Re-install and secure tabs on power supply baffle, coil extra cables, and locate them under the baffle.
|
||
| Step 7 |
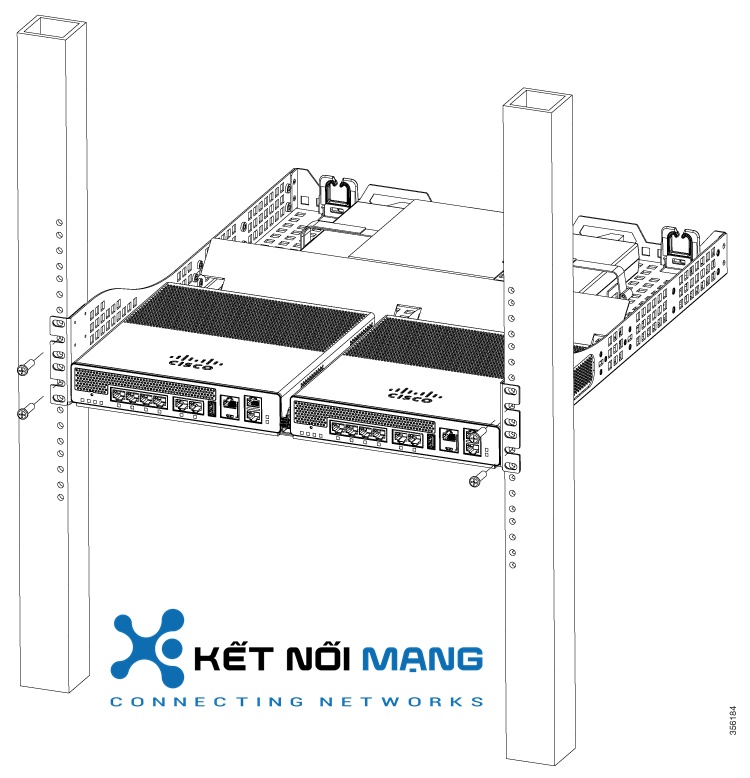
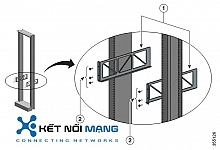
Attach the rack mount tray to the rack using the supplied screws and brackets, as shown in figures below: Figure 7. Attaching the Rack Mount Tray to a Front Post Rack |

|
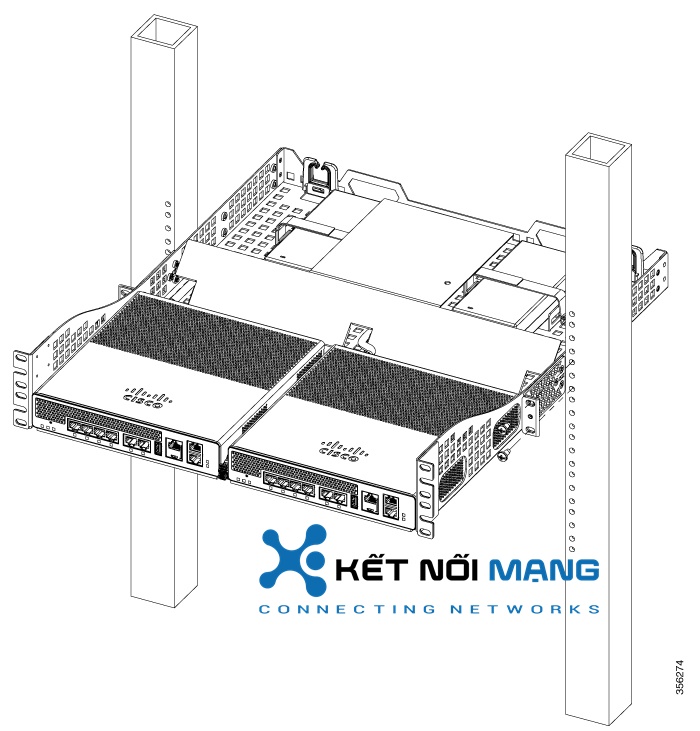
To remove the chassis from the rack, remove the screws that attach the chassis to the rack, and then remove the chassis. |
|
| Step 8 |
(optional): If required install the rear rack mount bracket for additional stability on four-post racks. Include optional orderable rear rack mount adapter kit: C4948E-BKT-KIT= C49xxE front and rear mount brackets. |
12 tháng
Sản phẩm xem thêm
Cisco 3504 Wireless Controller Rack Mount Bracket
Cisco 3504 Wireless Controller Rack Mount Bracket
Cisco Catalyst 9400 Series 4 slot chassis 19 Inch Rack Mount
Cisco Catalyst 9400 Series 4 slot chassis 19 Inch Rack Mount
Rack Mount Kit for 1RU for 2960-X, 2960-XR and 2960-L
Rack Mount Kit for 1RU for 2960-X, 2960-XR and 2960-L
RECESSED 1RU RACK MOUNT FOR 2960X, 2960-XR and 2960-L
RECESSED 1RU RACK MOUNT FOR 2960X, 2960-XR and 2960-L


Chủ sở hữu Website thietbicisco.vn thuộc về:
CÔNG TY TRÁCH NHIỆM HỮU HẠN THƯƠNG MẠI DỊCH VỤ KẾT NỐI MẠNG
Tên quốc tế: KET NOI MANG SERVICE TRADING COMPANY LIMITED
Tên viết tắt: KET NOI MANG SERVICE TRADING CO.,LTD
Số chứng nhận ĐKKD: 0314815571
Ngày cấp: 03/01/2018, nơi cấp: Sở KH & ĐT TPHCM
Người đại diện: VĂN NHẬT TÂN
Địa chỉ: Số 36/34 Đường Nguyễn Gia Trí, Phường Thạnh Mỹ Tây, Thành phố Hồ Chí Minh, Việt Nam
Địa chỉ giao dịch: 1061 Phạm Văn Đồng, Phường Linh Xuân, Thành phố Hồ Chí Minh, Việt Nam
Điện thoại: 84.028.35125568
Hotline: 09 014 014 86
Website: ketnoimang.vn | thietbifortinet.vn | thietbicisco.vn | knmrack.vn | alocafe.vn
Email: sales@ketnoimang.vn